
DIY Fresh Greenery Wreath

Spring is officially here and there's nothing better than doing a little spring cleaning followed by a fun DIY to welcome the warm weather.
Whenever I get the chance to incorporate fresh flowers or greenery in my home I take it because A. they smell amazing and B. they add a fresh element that makes the home feel light and inviting.
When you go to the floral shop you will see a variety of different greenery you can choose from. My advice is to go with what speaks to you. Each greenery gives a slightly different look than the other and you want yours to fit your home.
I chose to use silver dollar eucalyptus for this project. I hate to admit it but I have an unhealthy obsession with eucalyptus. Who knew love at first site with a plant was a thing! The reason I love it so much is because...
- It smells AMAZING!
- I love the muted green color.
- As it dries the leaves maintain their shape, color, and smell.
- It goes with so many different styles and decorations.

Follow the steps below to make your very own!
DIY Fresh Greenery Wreath Tutorial
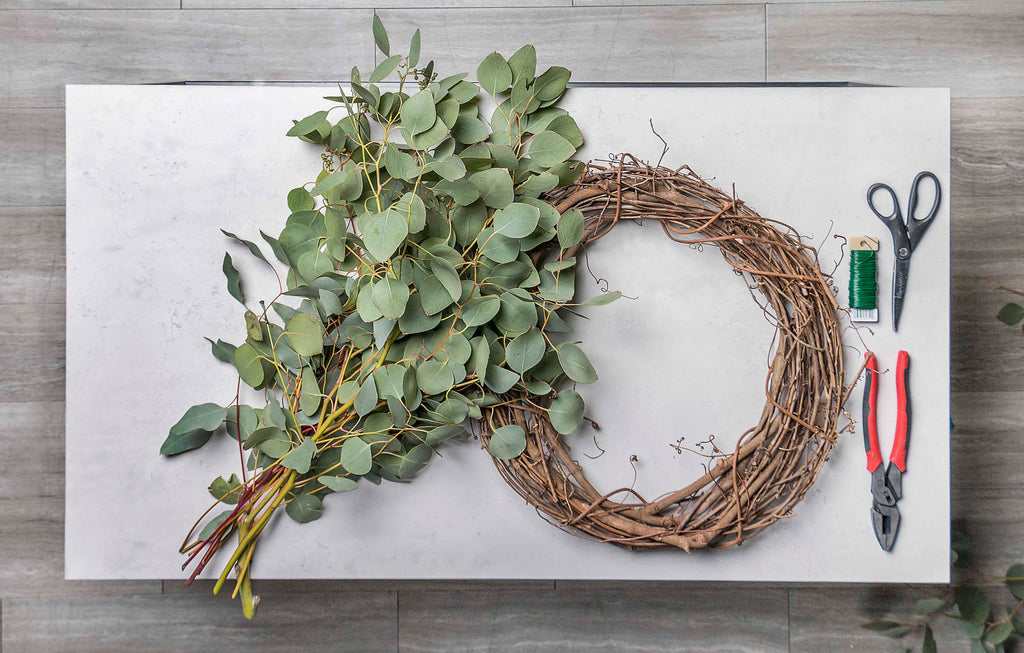
MATERIALS:
- Fresh greenery stems. I went to a local floral shop and got two large bunches of silver dollar eucalyptus but you can use any greenery you want. (You could also do this with faux greenery from a craft store).
- Floral Wire
- Wire Cutters
- Scissors
- 14" grapevine wreath. I found mine at Michael's and with the 40% off coupon it ended up being around $3.00. They also have 10", 12", 18", and 24" options available. Click here to shop the wreath.
Let's begin!
First, separate your greenery stems. Using your scissors cut them into pieces about 6" long.
Now it's time to start placing them in your wreath!

Starting with the larger pieces will help this project go faster as well as give the wreath a fuller look.
Begin by picking your best stems and placing them in the wreath.You don't want to put all your best ones in the same area.
Push the stem far enough down and into the wreath that it will not fall out. The twisted vine will help secure them stem.
*TIP* It is important to make sure that all the stems are facing the same direction. If you secure them in both directions your wreath could start to look too busy.

Start adding some of the larger stems followed by the smaller stems and continue this pattern around the wreath. It may start to look a little messy but don't worry because it's all part of the process.
Continue to add your stems until it looks like there is an even density around the entire wreath.
Once you have finished placing your stems on the wreath hold it up so you can see any stems that may be drooping. Simply take your floral wire and secure the drooping stems to the wreath. Feel free to trim any stems that are poking out.
I wanted my wreath to look a little messier and I wanted the stems to hang naturally so I didn't use a lot of wire.

Once you have all the stems where you want them you're ready to display it on your front door.
I hope you enjoy your beautiful fresh wreath and all the warm weather headed your way!

Be sure to tag @walkeredisonco on Instagram if you try this at home!
XOXO
Walker Edison